If you are getting ready for your first season of triathlon, you may be wondering what exactly needs to happen when you are in transition from one segment to the next. If you’ve been doing this a while, and can’t seem to nail a fast transition – you may be wondering – how can I make it faster, more efficient?
T1 – or transition 1 – refers to the shift from the swim to the bike. T2 – or transition 2 – refers to the shift from the bike to the run. While you will be doing some slightly different things in each of these transtions, the overall goal is to be as quick as you can be – while still being efficient. A fast transition that doesn’t allow you to grab everything you need (like your helmet!) isn’t a good transition.
Whatever your race day goals may be, we know you don’t want to spend unnecessary time hanging out in transition. So, here are some of our top tips and tricks for speedy and efficient transitions. While these tips are geared toward beginners, we think some experienced triathletes might like the refresher as well. 🙂
1. Layout & Finding Your Spot
A quick and efficient transition begins with preparation before the race begins.
Arrive onsite early enough that you can do a walk-through of the transition area, figuring out where you come in and go out for T1 (transition from swim to bike), and where you come in and go out for T2 (transition from bike to run).
You should count how many rows over you are from all the entrances and exits, so you can easily find your row. It can be quite chaotic, so this can save valuable time. If you aren’t sure of the flow of traffic, ask a volunteer. Be sure you understand which direction you need to run to get to/from your area to head out on the bike, and then on the run. Many times, the exit/entrance for the bike could be different from the run.
If possible, tie a bright ribbon to your transition area so you can easily detect it as you run down the row.
Identify any landmarks that are in line with your area, to make it easier to find it.
2. Setting up your area—general
You don’t have much space in transition – so don’t plan on spreading out too much. Keep your gear needs simple – to that which is necessary.
You can lay a towel on the ground to demarcate your space. This should not be a huge towel. I like to use a standard bath towel, folded in half (or smaller).
You may want to bring another towel to wipe your feet if the run from the water is particularly sandy. Some people also like to bring a bucket with water, but that often takes up a lot of space, wastes time, and can get all of your gear wet, so we don’t recommend it.
As you set up your area, keep the two transitions as distinct as possible. Keep your bike gear together, and keep your run gear together. For both transitions, you can place any loose items in a Ziploc bag so you can grab them easily.
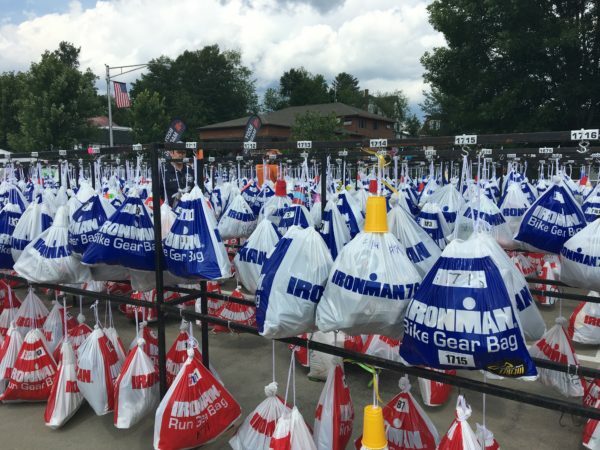
Note: for Ironman 140.6 triathlons, transition is a “clean” area, which means that you do not keep your gear at the same location as your bike. You use bags and grab them before you head to your bike. See the image below.
Most other transitions do NOT have a clean area, which means your gear will be laid out right at your bike location.

3. Setting up your area – T1

For T1, we recommend laying your helmet, upside down with the front of the helmet facing you. This way, when you pick the helmet up, all you need to do is flip it and put it on your head, and buckle the strap. You can place the helmet so that it balances on your handlebars. Alternatively, you can place it on the ground in your area.
Place your sunglasses inside of your upside down helmet so you don’t forget them.
Place your race belt, with the bib attached, over top of your helmet or handlebars or bike seat so you don’t forget it. (If you don’t have a race belt, we strongly encourage one – they are worth the investment!)
Place your bike shoes, with the front of the shoes facing away, so you can easily slip your feet into them. If you are going to wear socks, place your socks on top the shoes – separate them. Don’t keep them rolled or folded together.
You may also clip your bike shoes into your pedals, if you’ve practiced that in training. If not, race day is not the time to try this trick.
If you don’t wear your watch during the swim, and you want it for the bike, make sure to place the watch in a location you won’t forget it (and it won’t get lost!). Ideally, wear the watch on the swim (tuck it under the sleeve of your wetsuit.)
We recommend pre-loading your bike with your nutrition – sports drink & any gels or blocks you might use. You can store nutrition such as gels, bars or chews in a bento box.
4. Setting up your area – T2
For T2, place all of your items together neatly. T2 is less gear intensive, but you still may want a hat, some additional nutrition for the run, and of course – your sneakers.
As with your bike shoes, keep your shoes facing away from you

to get into them quickly. You can use zip shoelaces (such as Yankz or the ones made by Fuel Belt) so you don’t have to worry about tying your shoes.
5. Sit or stand?
If you want to have a quick, efficient transition, we recommend standing. Practice putting on your shoes and other gear while standing. If you decide to sit during your transition, be mindful of other athletes and try to avoid taking up too much space–especially as people try to run out. You can see from the images that there is not much space in transition. Be courteous :-).
Ideally, you should practice transitions during your workouts as much as possible. Set up your gear as if it were a race, and run through the protocol. You can even do this if it’s not part of a work, spending 15-20 minutes doing mock transitions.
A great workout you can do to practice transitions (and to get some fitness gains) includes the following:
- Before you start this workout, set up a mock transition area, keeping in mind the tips above.
- 10 minutes easy warm up on the bike.
- 4-10 sets of:
- Bike 8 minutes @ race effort
- Run 4 minutes @ race effort
- the number of sets you do here depends on your fitness and your race length. For sprint triathlons, stick to the shorter end of the range. The longer the race, the more sets you should add. Be mindful of total volume and make certain this is within your fitness level.
- Cool down 10 minutes easy ride.
Have questions? Comment below or contact us!